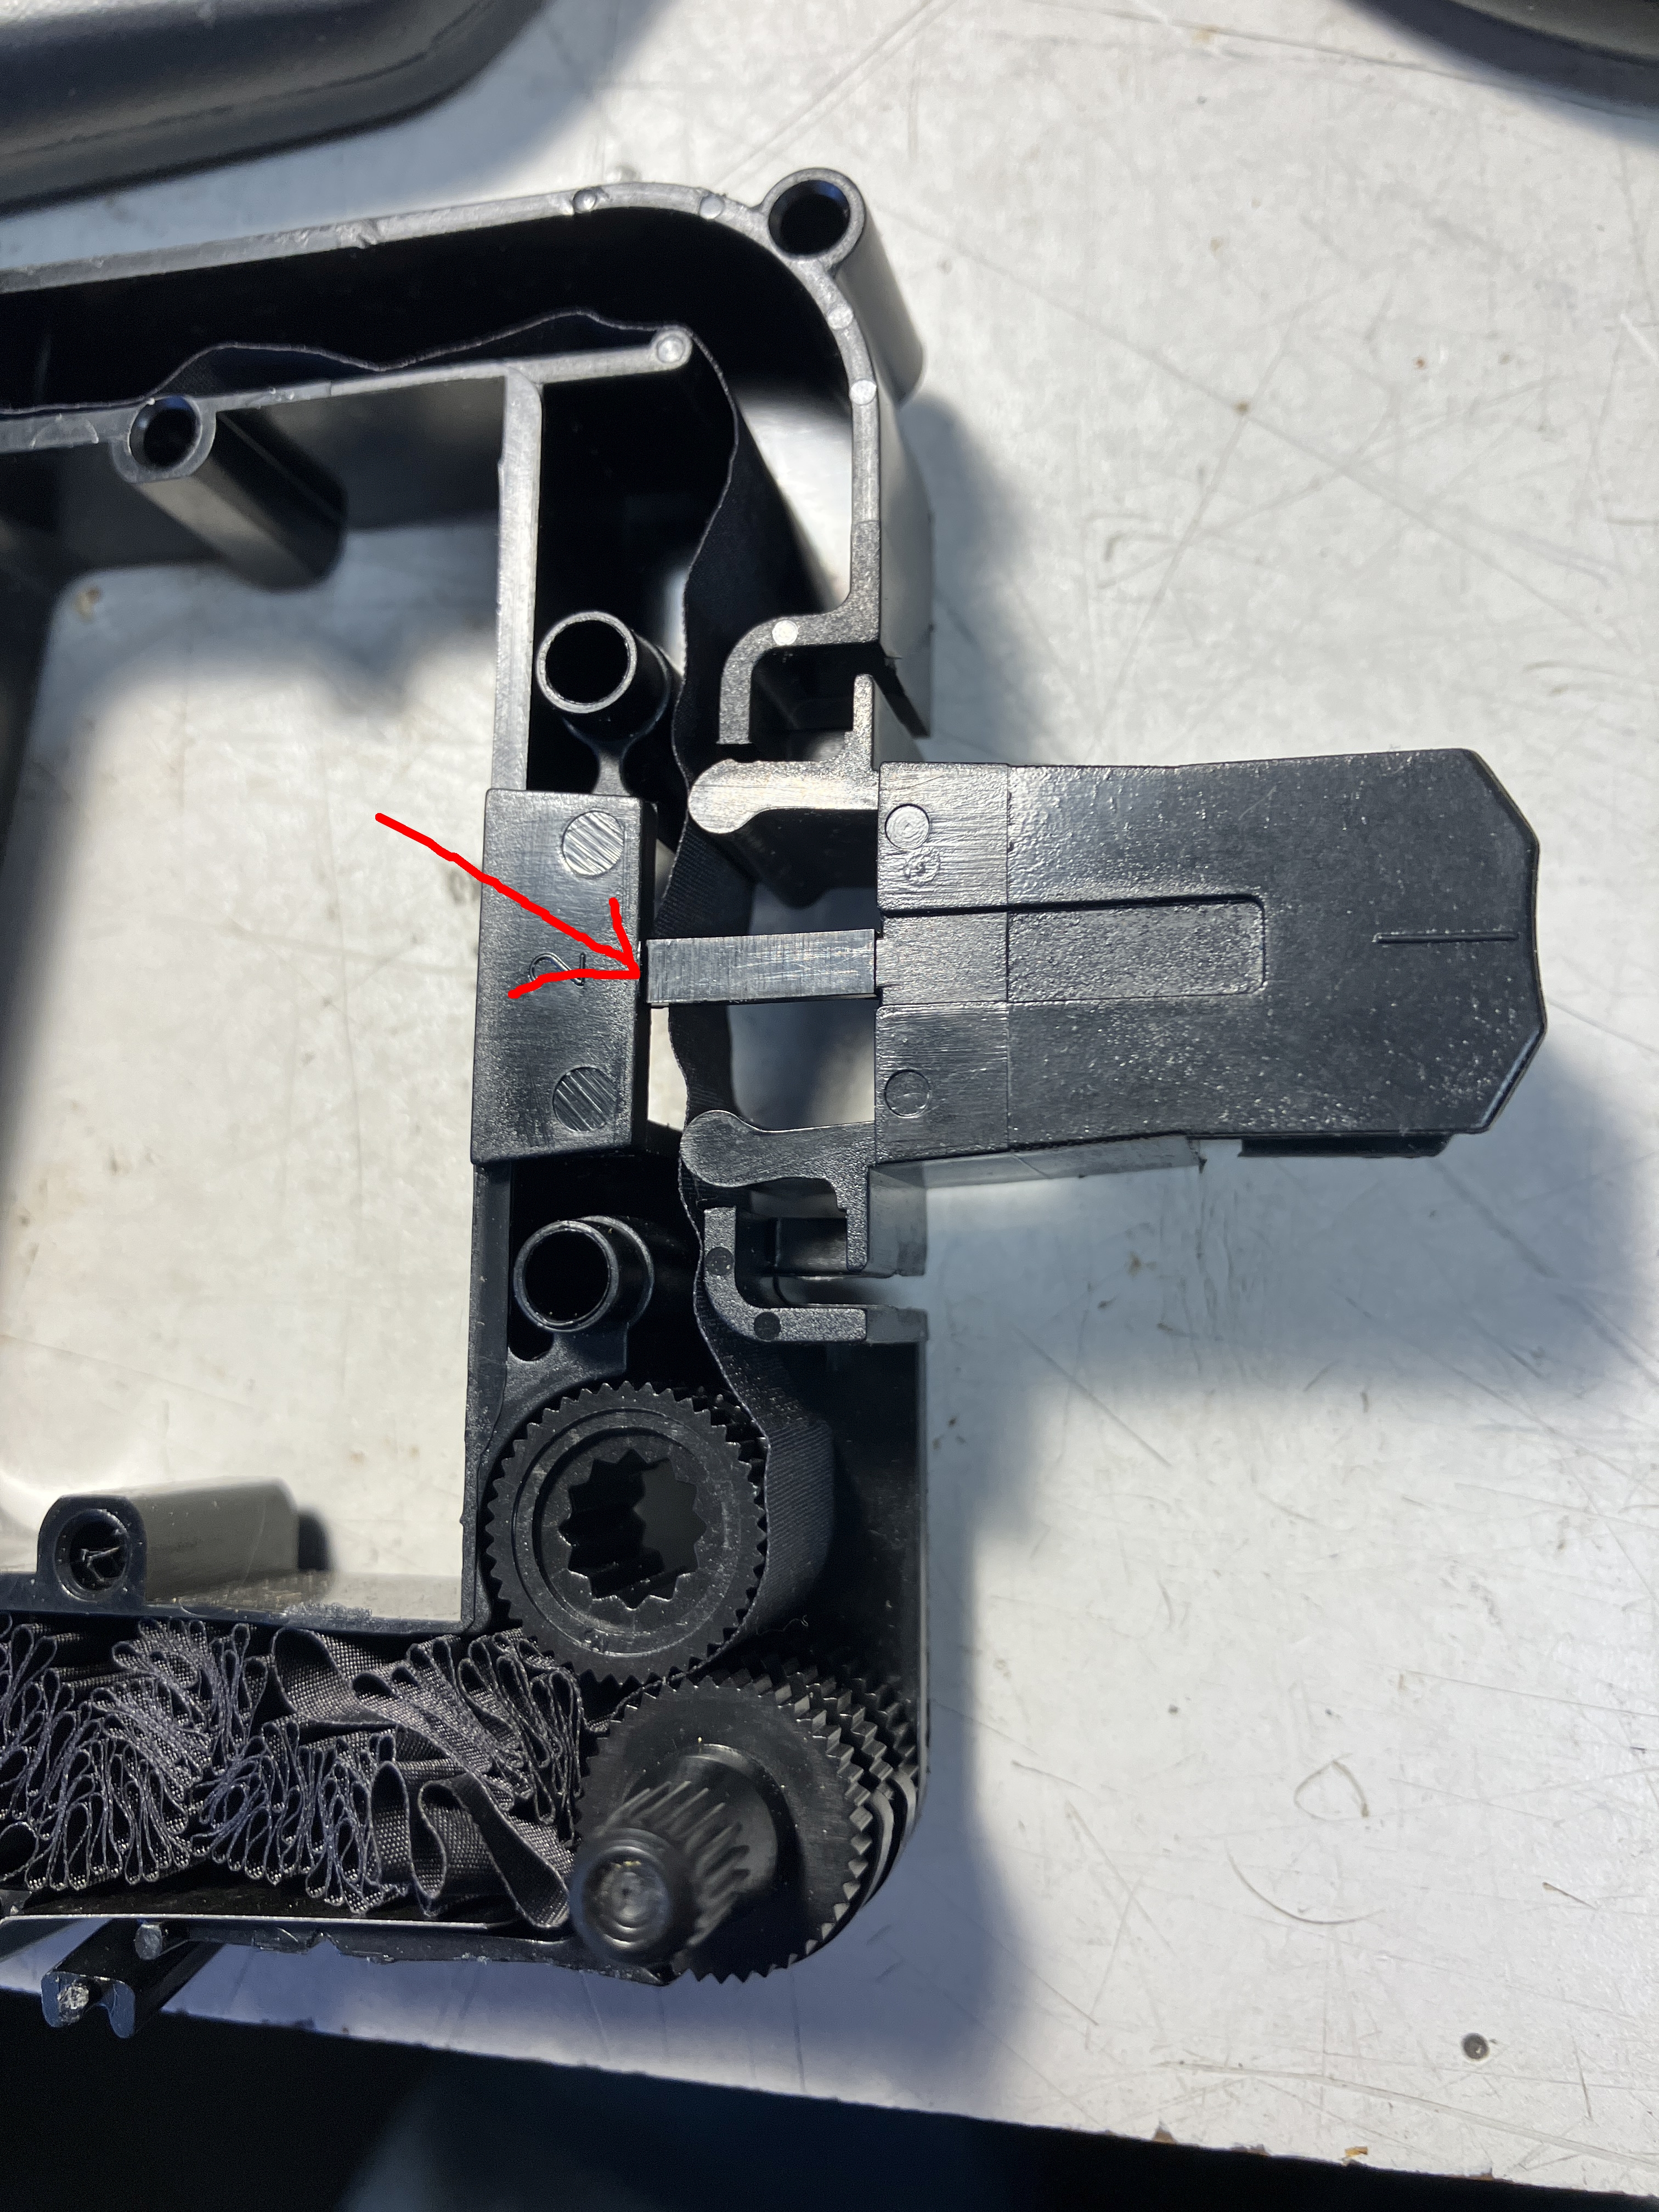
We will make a cut where the arrow is pointing so that the ribbon loop can be removed
Install a new ribbon by following the procedure here

Flip the cartridge over and apply a bit of glue to reattach the support bar.

The original cartridge makes it impossible to install a new complete
ribbon loop
(Our 3D printed cartridge modified the cartridge design to allow you to do that)
Here is how to remove an old loop without cutting - you can use this process to
install a new loop without cutting the loop.
Click on any photo for an enlargement
| 1. Remove the cartridge top - see
here for photos. We will make a cut where the arrow is pointing so that the ribbon loop can be removed |
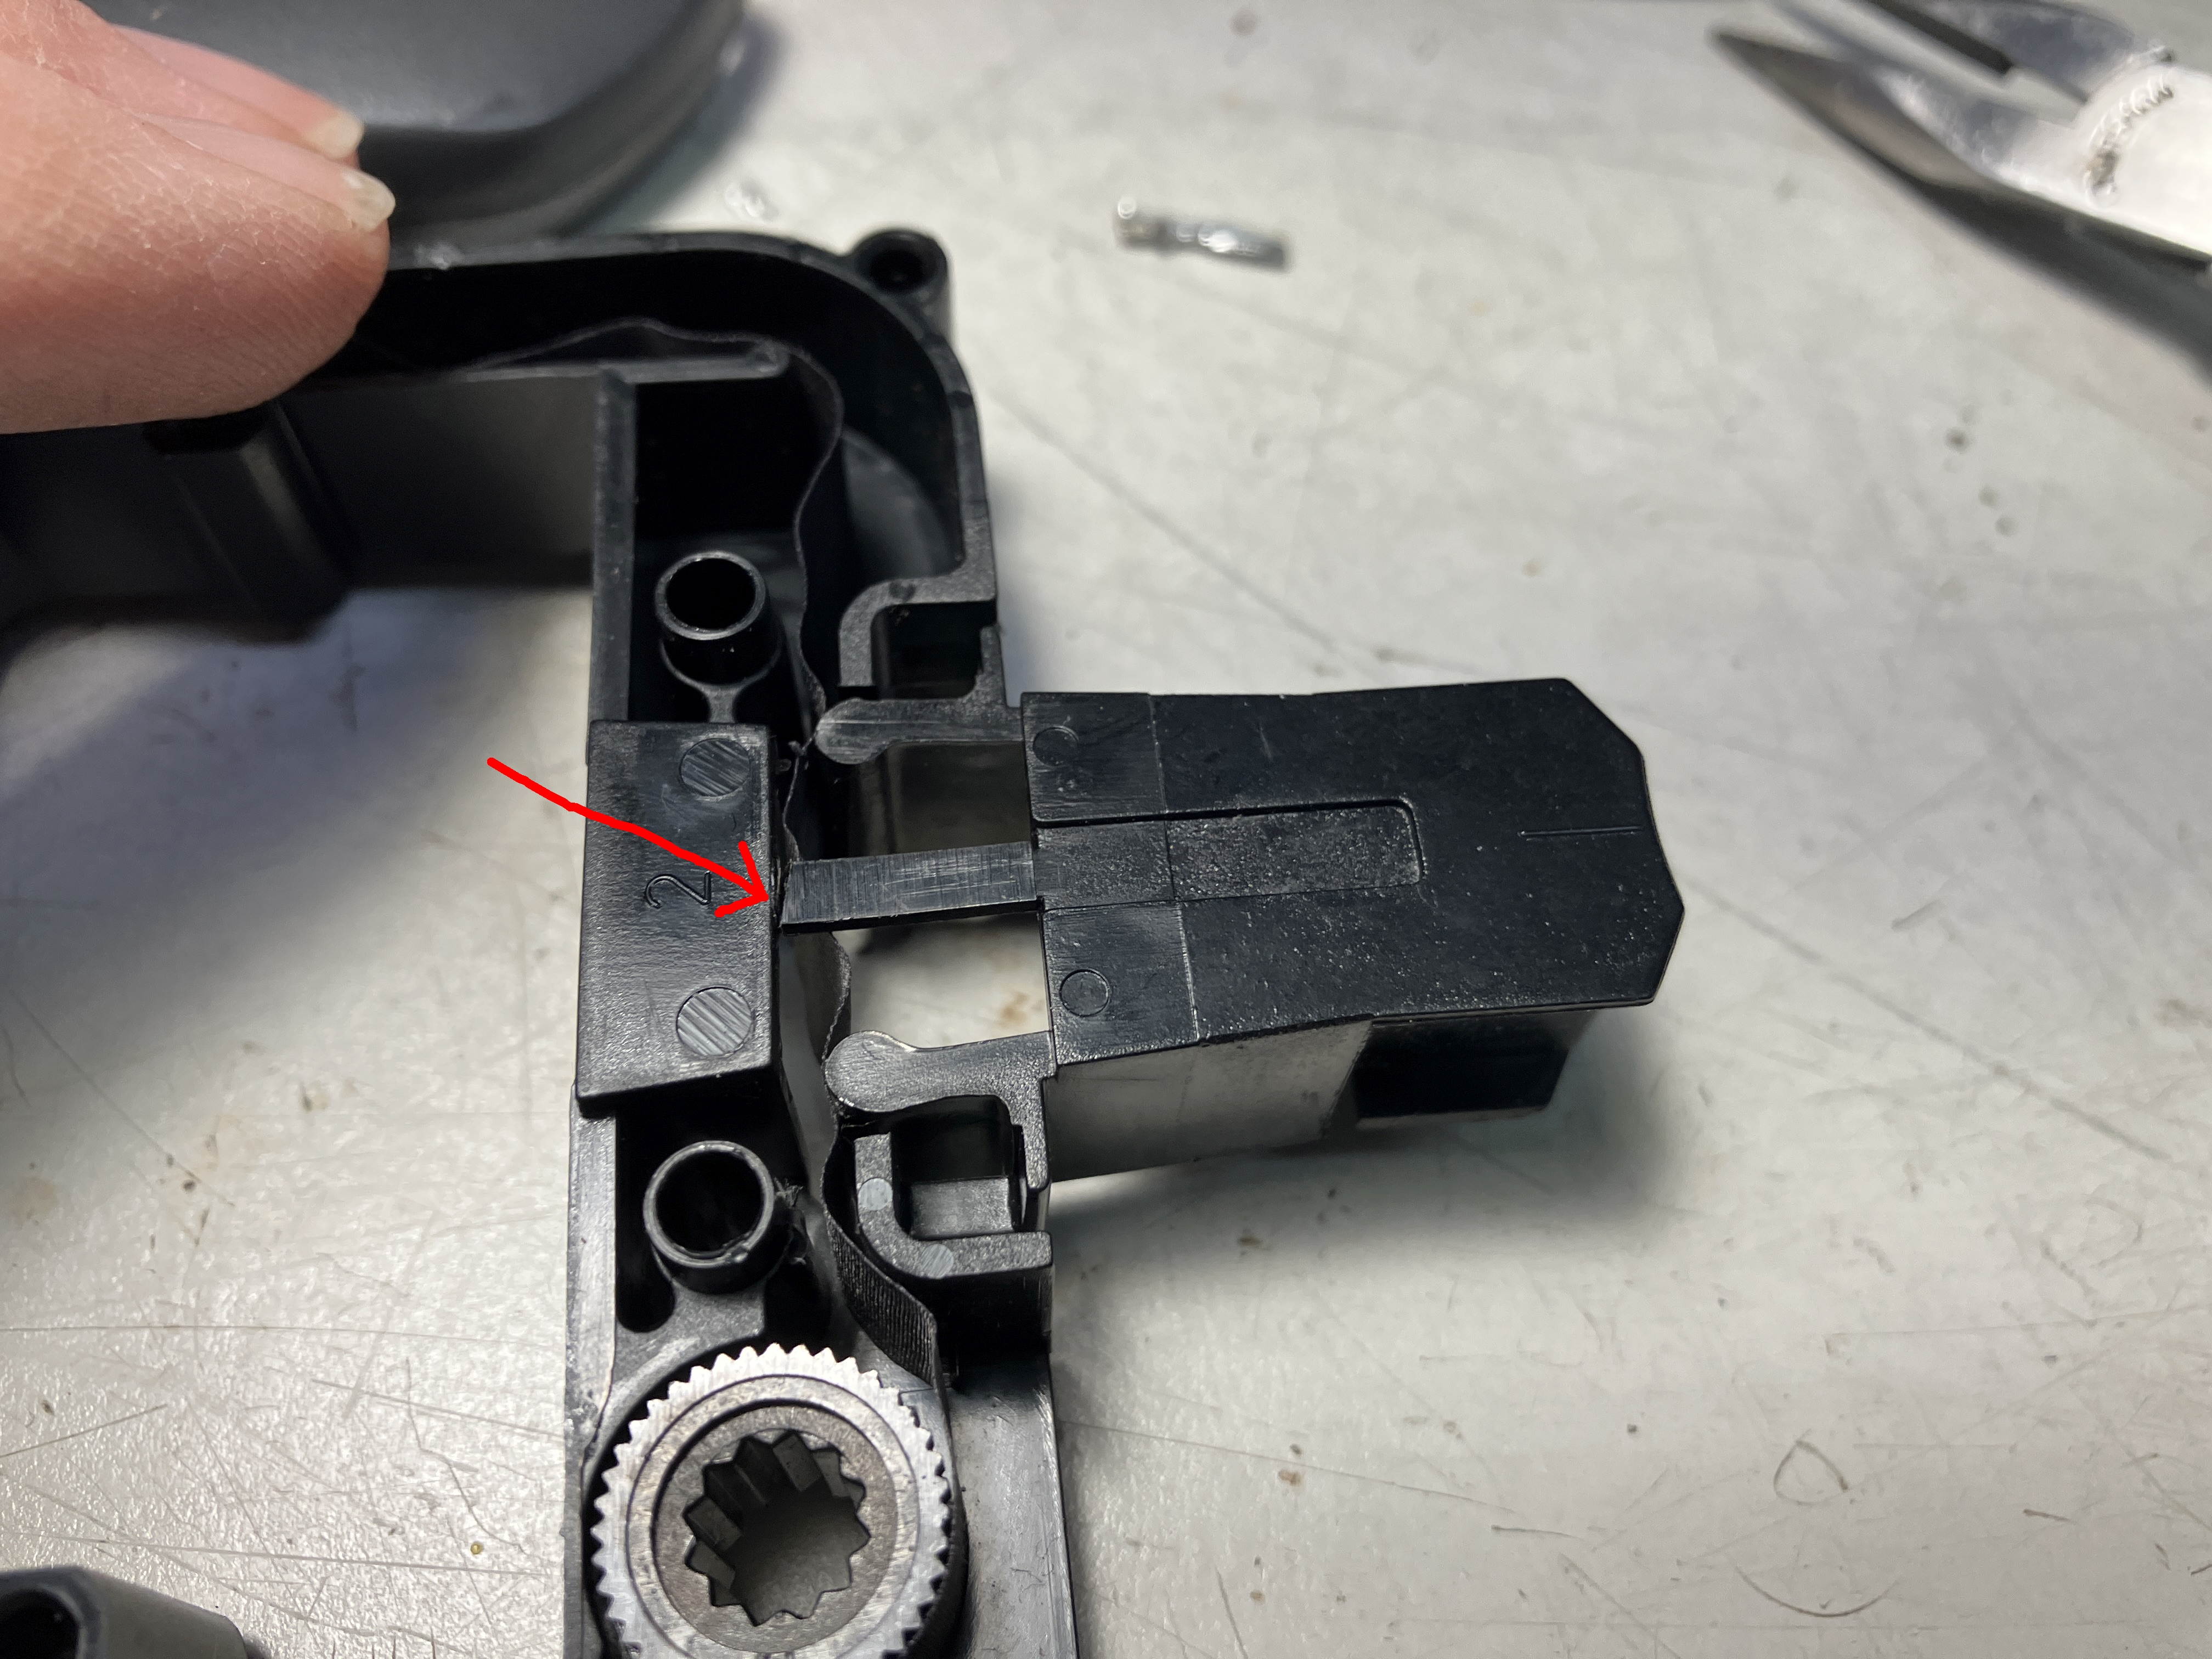
2. Use a utility knife or other sharp blade to
cut through the center support bar |
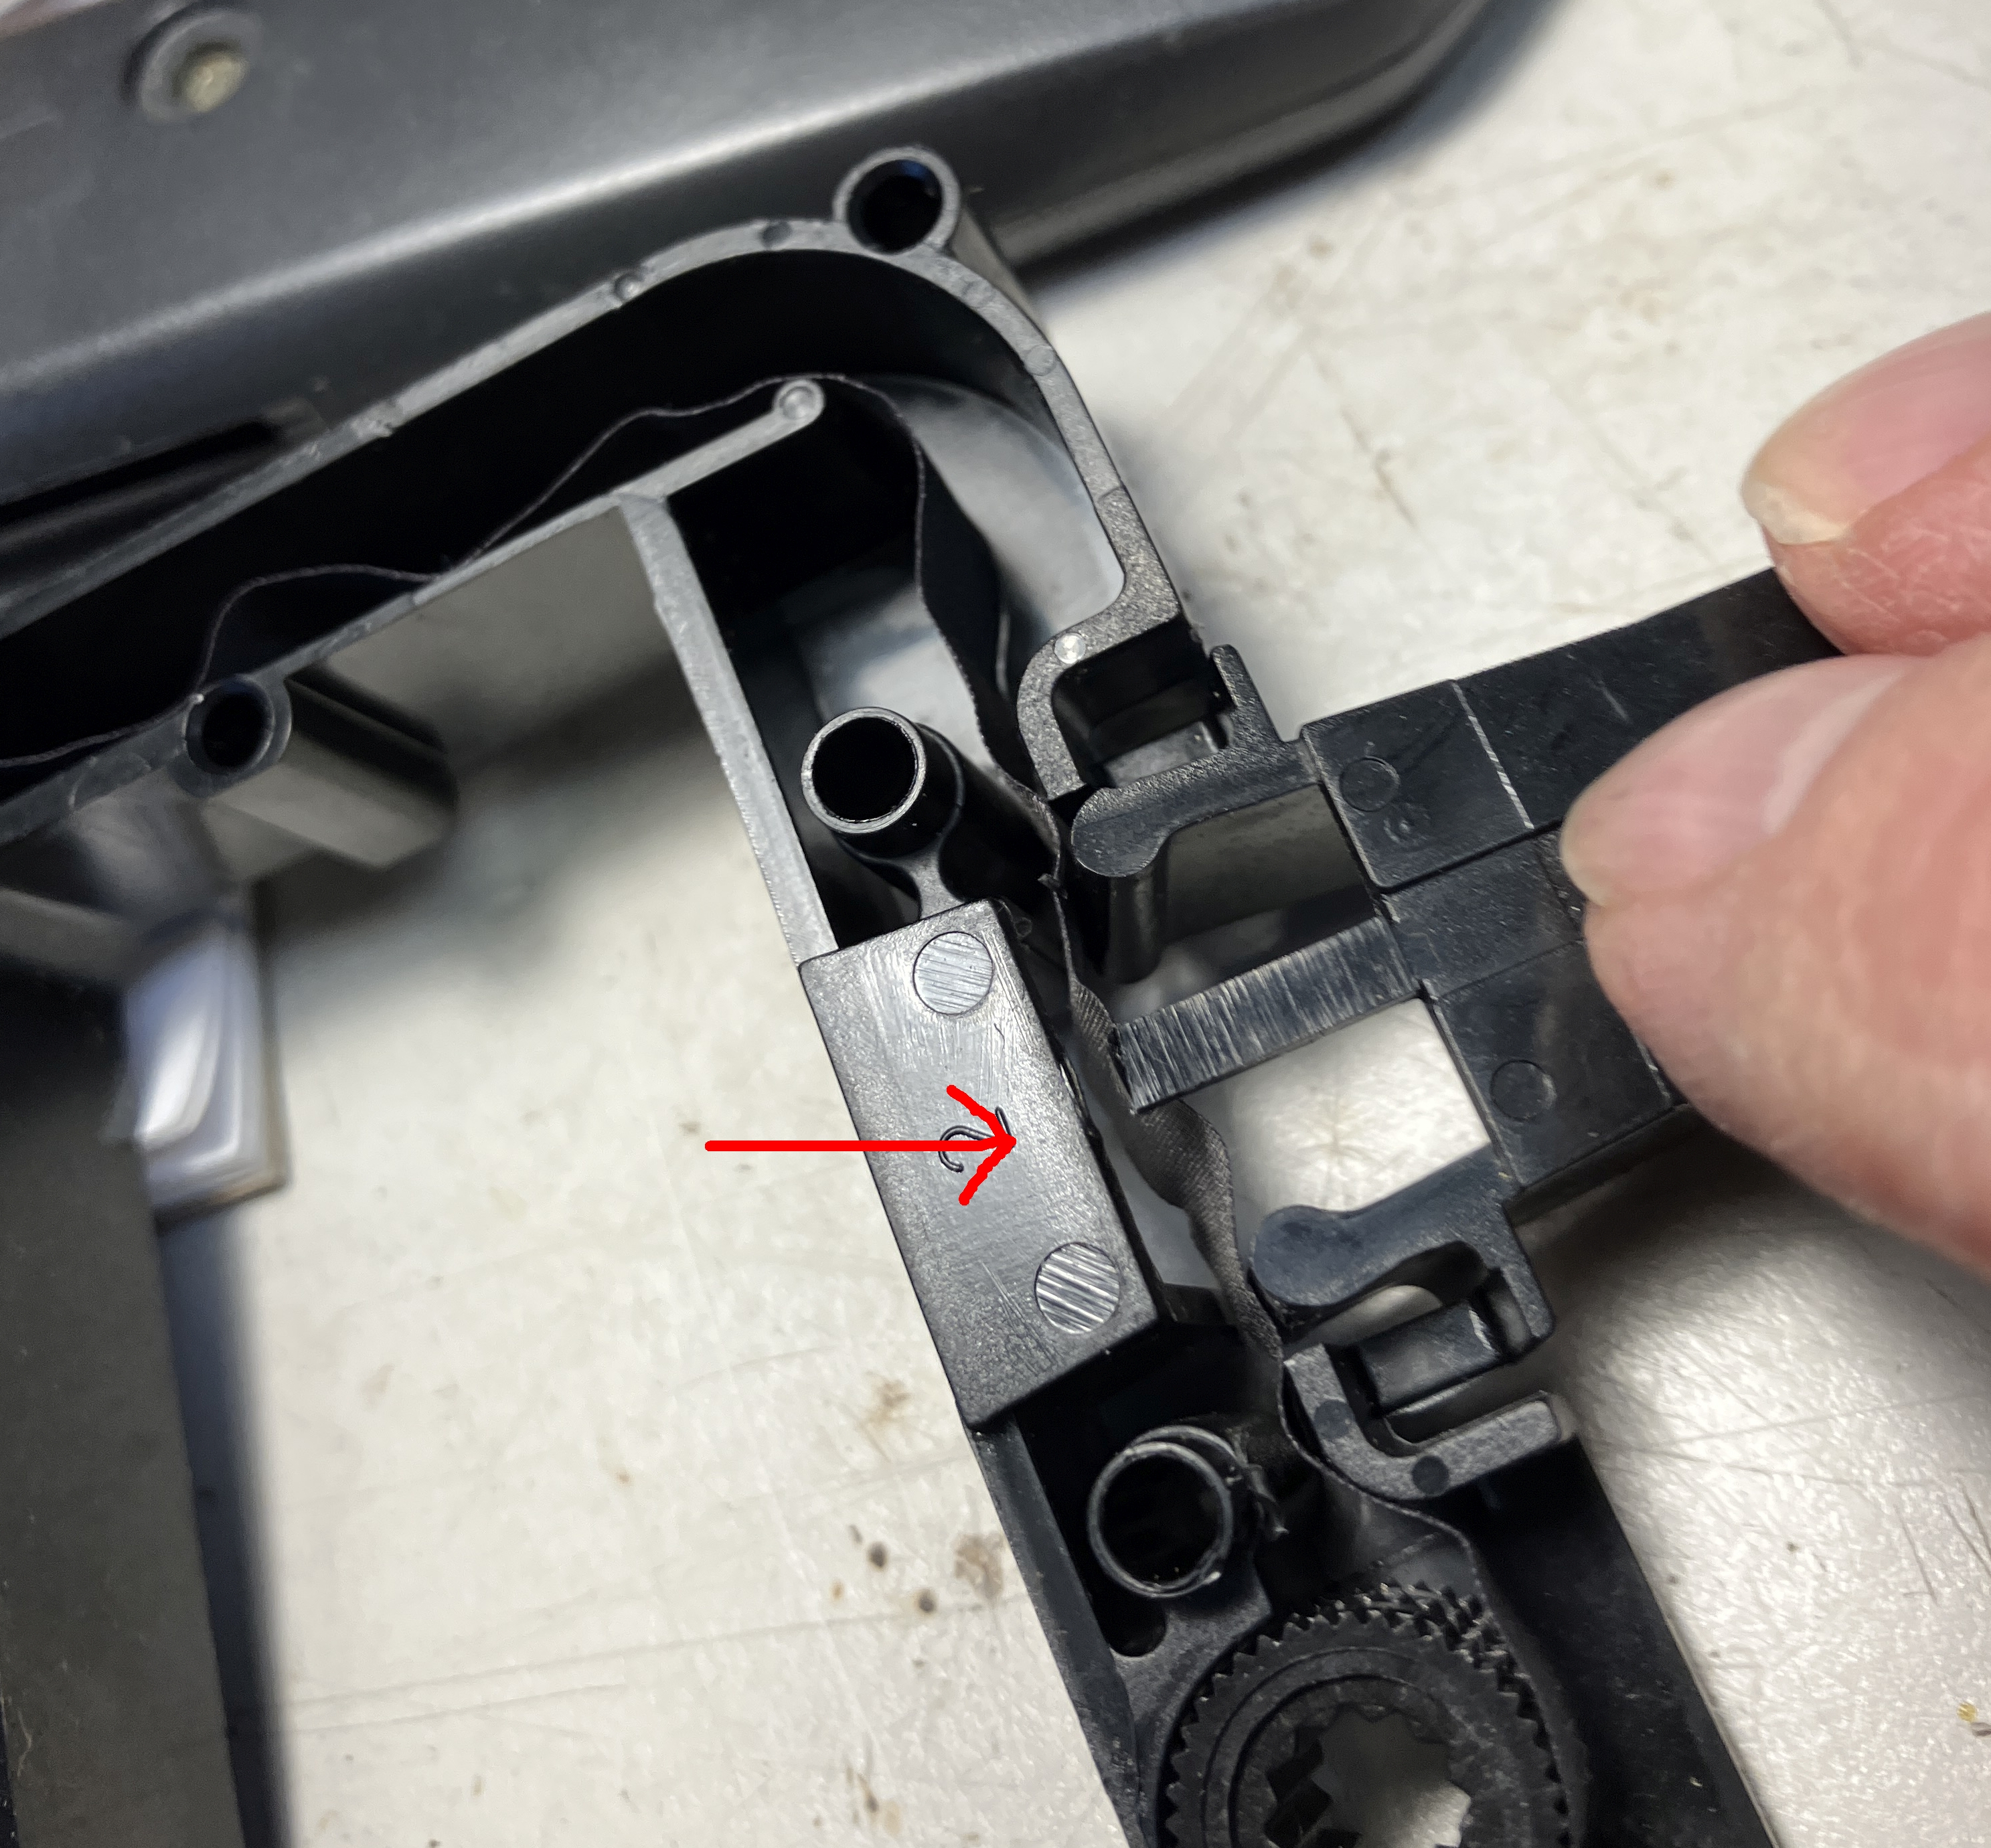
3. Gently bend down the head piece to open a
gap |
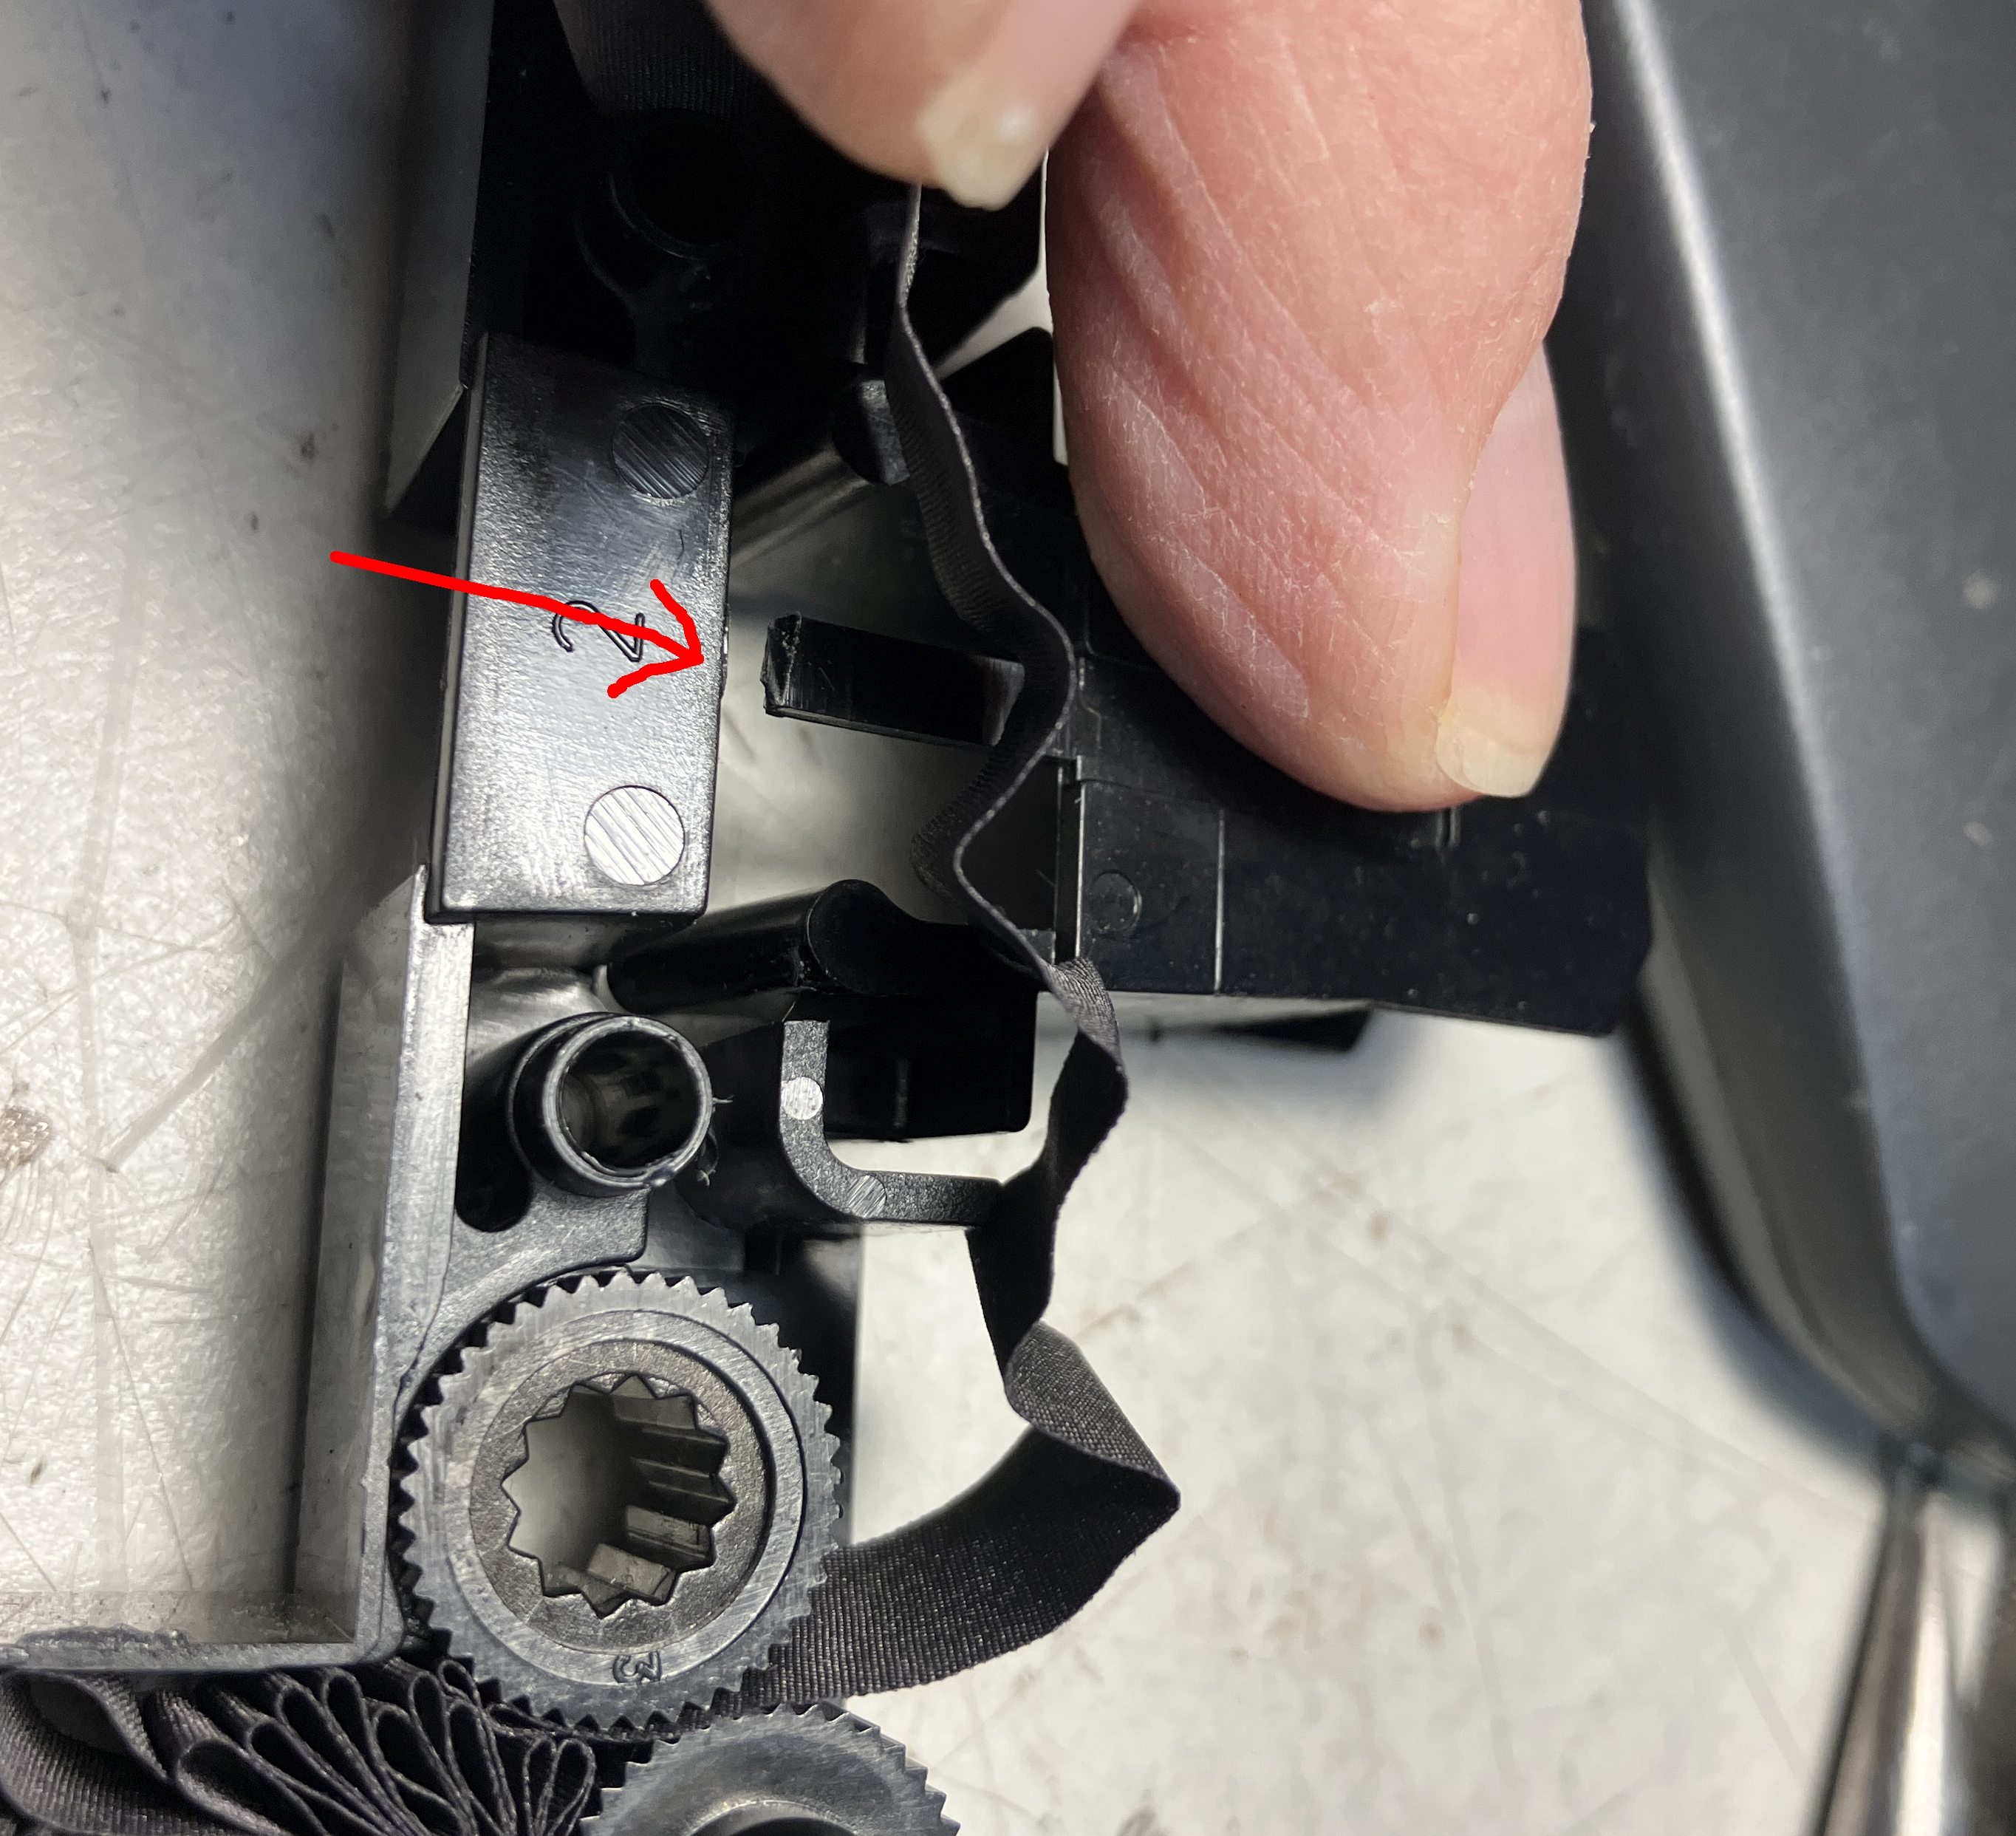
4. Pull the ribbon up through the gap. Now the
old loop can be removed and a new loop installed. |
Install a new ribbon by following the procedure here
|
After the new ribbon is installed Flip the cartridge over and apply a bit of glue to reattach the support bar. |
Reattach the top and check that the new ribbon advances smoothly. | |